Adding Share Buttons with AddThis
Sharing your content is no longer a nice-to-have; people spend a lot of valuable time on social platforms. Encouraging your visitors to spread your content across a broad range of social networks and drive more traffic to your site requires a certain strategy. There are many ways people can contribute and spread the word, so it’s in your power to guide them to the right channels.
In this article, we will walk you through how you can get the share buttons relevant to your goals and overall plans for your digital presence.
Step 1 – Use AddThis for Sharing Buttons
We’re offering a custom integrated solution with one of the most popular social sharing services out there: AddThis. We have chosen it due to its wide use, many supported social services, and the available customization options. On top of that, you also get social sharing analytics (even integrated with your Google Analytics property), which means you can make better decisions regarding your audience.
Please bear in mind that we don’t have any commercial link or agreement with AddThis to promote their service, be it free or paid (they do have a Pro account option). All of the suggestions we made are based on one goal: to help our customers get the job done.
Next, we will share some hints about how we have envisioned social sharing in Timber.
Step 2 – Configure AddThis Social Sharing
AddThis offers quite a large number of supported services, each identified by a specific, lowercase name that you can find on this particular list. Next, we will walk you through the process of adding these share buttons on your website.
Here’s what you need to do:
- Log in to the WordPress Dashboard;
- Go to Appearance → Customize → Theme Options → Share Settings, and fill in the Share Services’ field (below it there are instructions on how you can easily add your favorite social channels);
- Click on Publish, and you’re done for now.

Step 3 – Display the Share Links
The next step to make the most out of social sharing is to display the sharing button in the right spot. People need to easily find them in order to engage and drive results.
You can easily enable or disable the Share Links on your website by going to Appearance → Customize → Theme Options → Share Settings and checking or unchecking the Show Share Links option.
Step 4 – Customize your sharing services
You can enter as many different services as you want, and they will show on your site (here is the complete list).
You can also have a “more” button (the + sign button) that will open up a popup where people can search for their particular service. All you have to do is add more next to your other social networks. This means you don’t have to add a large number of services to make sure you cover all your bases, just the most relevant ones.
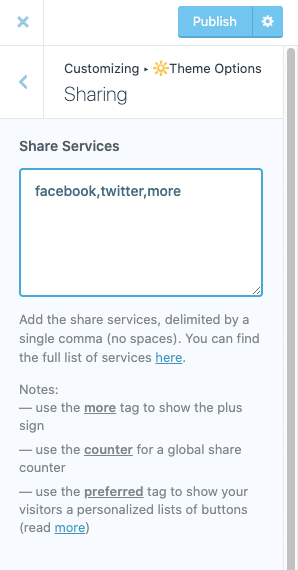
On top of this, another great thing about AddThis is the preferred button that will display your visitors’ favorite social services, saving the time of finding them.
This feature allows you to cater to a much wider audience, since there are so many social services nowadays.
You can add the preferred text multiple times, and the system will fill those options with personalized social networks (e.g., preferred,preferred,preferred,more). You can read more about it here.
If you want to learn more about how to go beyond social sharing and build a community around you and your business, check out this article. You will find information regarding how to build a loyal community online with the right digital tools and how to foster an offline community by meeting people in person.
Removing the AddThis cookie
If you don’t use AddThis and don’t want their cookie to load on your website, here’s what you need to do.
- Make sure you have the child theme installed and activated. This ensures that future theme updates won’t remove your code edits.
- Navigate to Appearance → Theme File Editor – click the Theme Functions (functions.php) file in the right panel
- Scroll to the bottom of the file and paste the code below:
/*Remove AddThis cookie*/
function child_dequeue_addthis() {
    wp_dequeue_script( 'addthis-api' );
}
add_action( 'wp_enqueue_scripts', 'child_dequeue_addthis', 20 );

function undefined_addthis_quickfix() {
$script = '
  if ( typeof window.addthis === "undefined" ) {
    var noop = function() {};
    window.addthis = {
      addEventListener: noop,
      init: noop,
      ready: noop,
      toolbox: noop,
      update: noop,
    }
  }
';

   wp_add_inline_script( 'pile-main-scripts', $script );
}
add_action( 'wp_enqueue_scripts', 'undefined_addthis_quickfix', 20 );- Click the Update File button. That’s it.