Creating the Homepage (Front Page)
With Noah, you have the flexibility of bringing your projects center stage on your homepage. All you have to do is follow the steps below and you’ll be set in no time.
Step 1 – Create a Homepage
From your WordPress Dashboard, click on Add new and name it “Home” or alike to remember it easily.
Step 2 – Change the Page Template
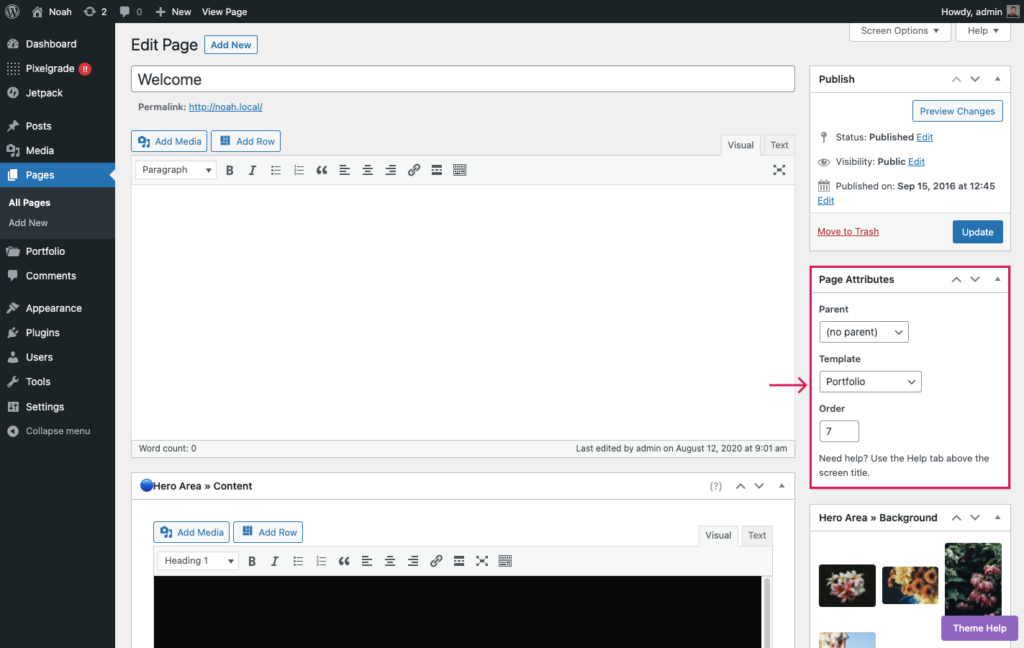
Change the page Template to Portfolio from the Page Attributes section in the right settings panel. This will allow you to display your projects on your homepage.

Step 3 – Add content to the page
There are three main areas where you can add content (text and images):
- Main content area – where you can add text, images, galleries, and more.
- Hero Area >> Content – this is where you can add the title and description that will show at the top of the page, select the height of the Hero, the content alignment, and whether you want to show the Hero Images in a slideshow.
- Hero Area >> Background – from which you can add images in a slideshow and videos that will display at the top of the page. Learn more about how to use it.
Step 4 – Set a Static Front Page
To finish this up, let’s put the above-created page on the front page. By default, WordPress displays the latest posts there — to change that and show your new “Home” page, follow the standard method:
- Navigate to Appearance → Customize, and click on the Homepage Settings tab on the left.
- Select the A static page option, then choose your new page from the Homepage dropdown.
- Click on the Publish button to save your static page settings.
Now your homepage can showcase your awesome projects and help you get more exposure for your work.