Creating the website navigation menu
We all need landmarks in the digital world, right? When talking about the ecosystem of a website, the navigation menu can be considered a comrade. In the end, it is just a map that guides you to dig deeper and fully enjoy the website.
It may sound naive, but it is what makes users leave a website without hesitation. A bad navigation can bring frustrations and create an illogical flow. The good news is that WordPress includes a reliable menu manager tool to keep people on track and convince them to come back.
Who doesn’t want such a behavior, right?
First, let’s learn about what makes a navigation menu right and how it can help you get the desired results, and then we will move to the step-by-step tutorial on how you can set your up in no time.
Step 1 – Create your navigation menu structure
Let’s start with a definition to get on the same page. A navigation menu is a set of links that sit at the top of your website (in the Header). Its role is to link to the other pages of your website.
The first step to ensuring that your navigation menu can help you accomplish your goals is to decide the structure and what pages need to be visible (almost) everywhere people visit your website. Think of it as something similar to a sitemap—which is simply a list or diagram of all the pages of your website and how they connect.
In the example below, you can see how our navigation menu structure from pixelgrade.com looks like:
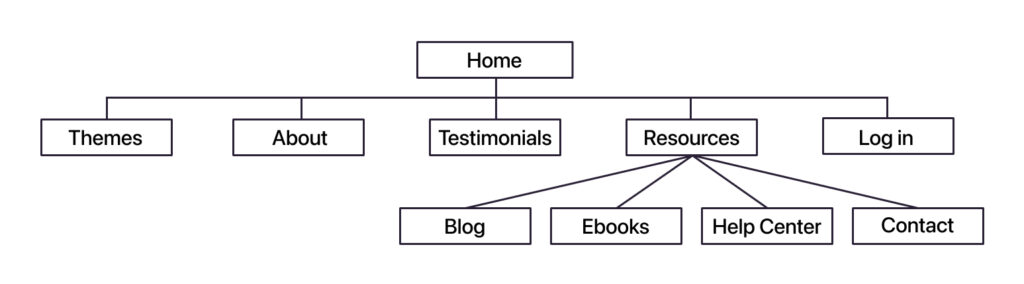
As you can see, the top navigation menu has five main items (Themes, About, Testimonials, Resources, and Log in), and one of them has another four sub-items (Blog, Ebooks, Help Center, Contact).
Of course, the sitemap will go deeper since every page has other pages it links to (e.g., the Themes page has all our themes listed there, and each theme links to the Pricing page, and so on). For the purpose of building the main navigation, creating a visual representation can be helpful. You can also do it in the form of bullet points on a piece of paper; no need to go fancier.
The key is to analyze each link you add to the main navigation and determine what goal it will help you complete. It can be to help people learn more about you (like an About page), get in touch with you (through a Contact page), or see a list with all your services, products, or educational resources (like blog posts, ebooks, and so on).
There are also other places where you can add navigation menus. A commonplace is to add links in the footer. If you want to learn from our experience of recreating our website’s sitemap and see how we decided what links deserve the top spot and what should stay in the footer, I highly recommend reading this article.
When it comes to the top navigation, there are a few important things to look out for:
- The magical number seven (plus or minus two) – this is because short-term memory holds only seven items. It’s a fact, not wishful thinking. With fewer menu items, your visitors’ eyes are less likely to scan past important items. Every time you remove a menu item, the remaining items become more prominent. Challenge yourself to limit your navigation to five items.
- Avoid drop-down menus – by not using drop-down style menus, you reduce the possibilities for website visitors to miss relevant content. Keep it simple.
- The order of your menu items matters – the most important items are those at the beginning and the end of your navigation because this is where most visitors’ attention goes to.
These are all the essential things you need to know before you start actually creating your menu. If, however, you want to go a bit in-depth, I recommend reading this article that provides extra tips on things like naming for each item, SEO friendliness, and more.
Step 2 – Build a custom navigation menu
Once you figured out your most important pages and their specific order, you can move to the next step and start building the navigation.
You can easily create navigation menus in WordPress by logging into your Dashboard and going Appearance → Customize→ Menus. Once you’re there, click on the Create a new menu button.
Decide on a name and set your menu’s display location (the place where it will be displayed) by checking the field you find suitable under the Menu Locations section. The available display locations depend on the WordPress theme you are using.
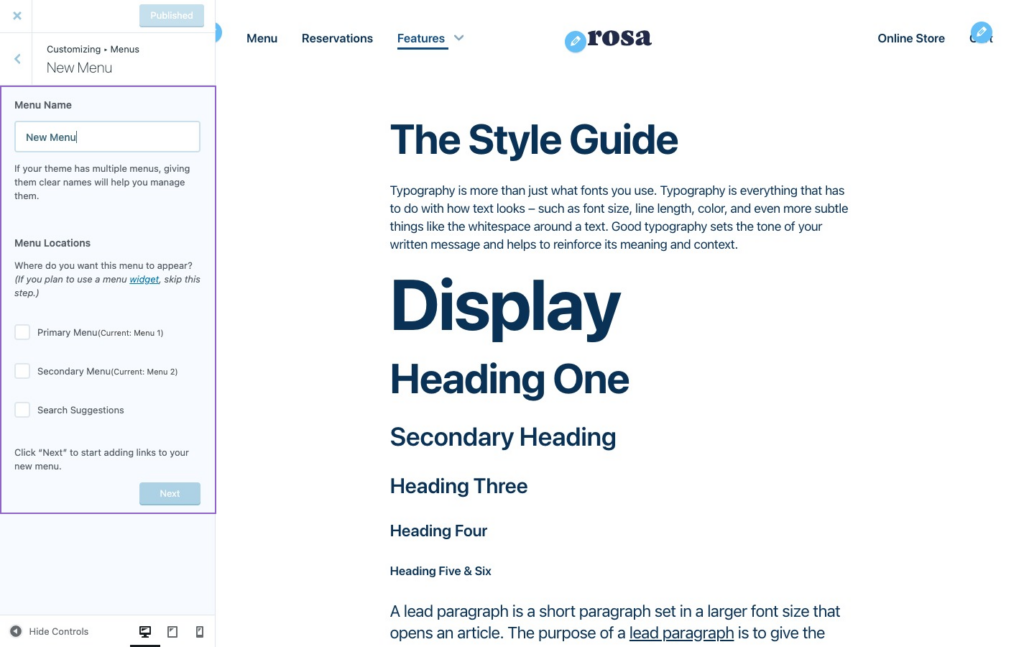
In the case of Mies, if you want the menu at the top of the page, choose the Main Menu or Main Horizontal Menu option.
Now just press Create Menu and move to the next step.
Step 3 – Add items to your menu
Once you have a new menu created and a location for it, all you need to do is add menu items. There are several types of menu items available, such as:
- Pages: Adds a link to another page on your site.
- Posts: Links directly to a blog post on your site.
- Custom Links: Adds a custom URL linking to an internal or external site (e.g., social media channel).
- Categories: Shows a feed of blog posts from a given category.
- Tags: Shows a feed of blog posts from a given tag.
To add items, click on the Add items button and select the pages, category, or enter the custom URL and click on the ⊕ button. When you’re done, click on Publish.
Step 4 – Organize your menu
With all the menu items in place, you can change the order and the placement of the menu items by simply using the drag-and-drop gesture. Using the same system, you can even create sub-menus or drop-down style menus. Just drag the individual items to the right and set them under a parent tab.
In case you want to revert your changes, please drag the menu items to the left to make them parent again. Feel free to play around, and find the right scheme for your particular needs.
Below is a video that showcases how to create submenus in WordPress.
Step 5 – Place menus in different locations
Everything is pretty much set once you reached this step. The next phase is to let WordPress know where you need the navigation menu to show up. To do that, browse to the Menu Locations area from Appearance → Customize → Menus → Menu Locations. Depending on what theme you’re using, you’ll be able to choose from various menu locations. Simply assign the previously created menu to the desired location, and you are off to the races.
In case you want to go a step further, you can use the Conditional Menus plugin to display different menus when specific conditions are met. For example, when a visitor ends up on the Shop page, you can choose to display product categories instead of the default menu items (Homepage, About, Contact, etc.). To learn how to achieve this result, you can read this in-depth article.
FAQ
How do I create an un-clickable parent tab for my sub-menu?
To create a menu item that is not clickable but will still contain sub-menus items, click on the Custom Links option and add a # symbol in the URL field.
Showing items only to logged in/out users
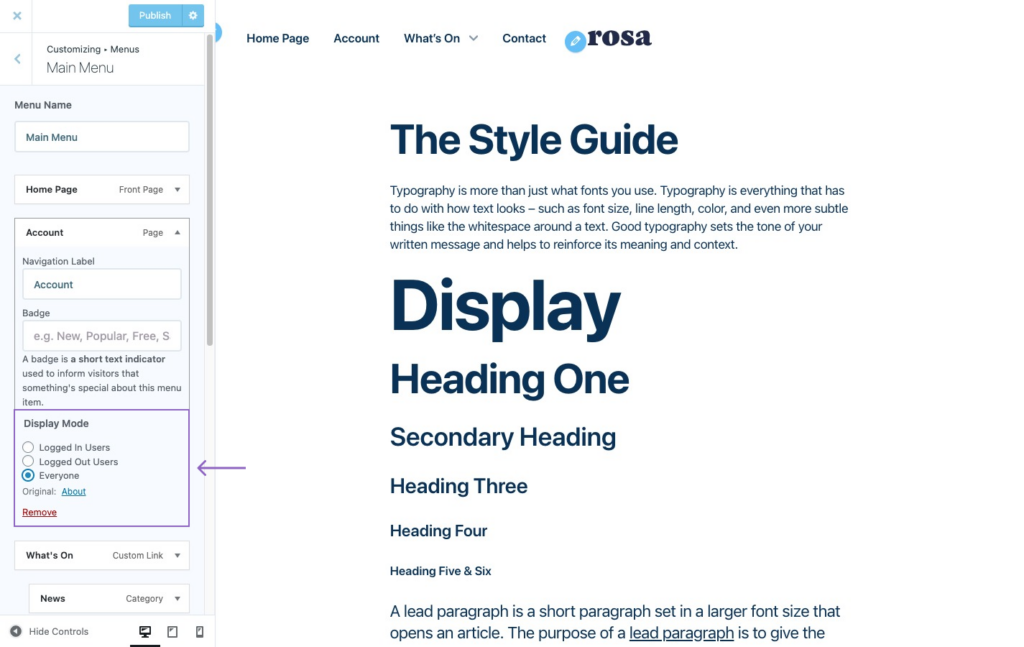
Some links only make sense if a user is logged in or not. For example, you definitely want to show the Log In button only if a user is not already logged in on your website. To do that, we will use the flexible Nav Menu Roles plugin, which will add some controls for each menu item in Appearance → Menus.
Once you install and activate the plugin, navigate to Appearance → Customize → Menus → select a menu item, and change its Display mode. You can choose to show it to logged-in users, logged-out users, or everyone.
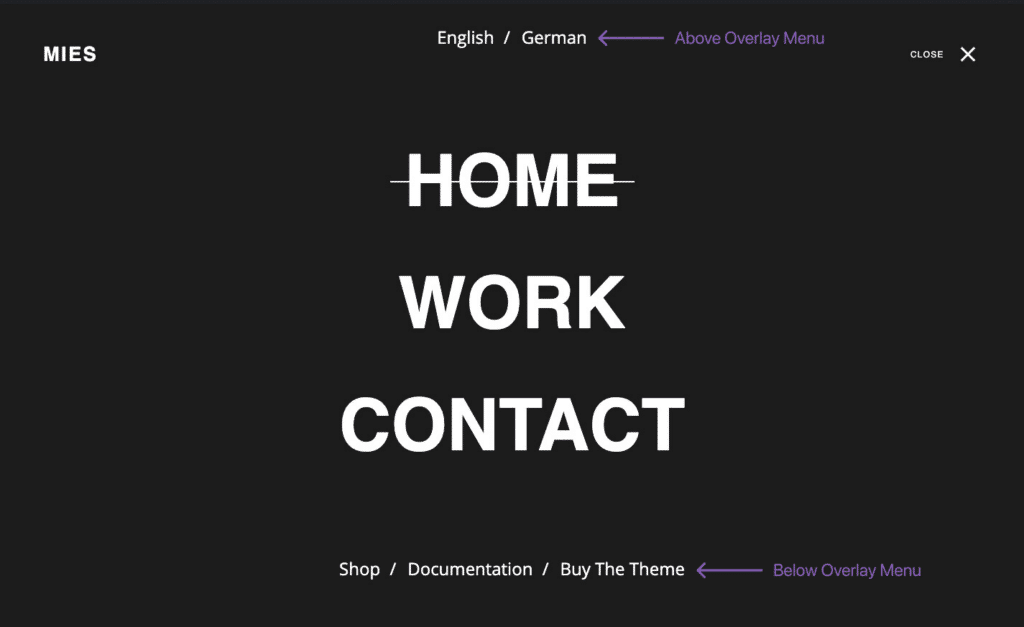
Adding menus above and below the Overlay Menu
With Mies you can add two extra menus in the Overlay Menu area, one above and one below.
To add them, follow the steps below:
- Navigate to Appearance → Widgets;
- Once you’re there, you will see two Widget Areas:
- Overlay – Before Menu, which adds content above the main Overlay Menu;
- Overlay – After Menu, which adds content below the main Overlay Menu.
- Add the Navigation Menu widget in one of the Widget Areas and select the navigation menu you want to display.

Looking for a WordPress theme?
Search no more. Take a look at our products and choose what works best 👇