Managing Projects
Projects allow you to create, manage, and showcase your portfolio using Lens. Each project can contain text, images, and videos, which means that you’ll be able to showcase your work in the format that fits best.
Adding a new project
To add a new project to your website, from your WordPress Dashboard, navigate to Projects → Add New. Once you’re there, you can add the title in the top bar and your project’s details in the text area below.
Adding images
The way you can add images to your projects depends on the Template Style you chose for that particular project. Lens comes with three Template Styles:
- Full Width Slider – here is an example;
- Sidebar Right – here is an example;
- Classic – here is an example.
You can easily switch between them from the Project Details area. View screenshot for details.
If you are using the Full Width Slider and Sidebar Right template, you can upload images using the Gallery section. Here’s a demo video:
If you go for the Classic template, you must add the images in the project description area using the Add Media button. Here’s a demo video:
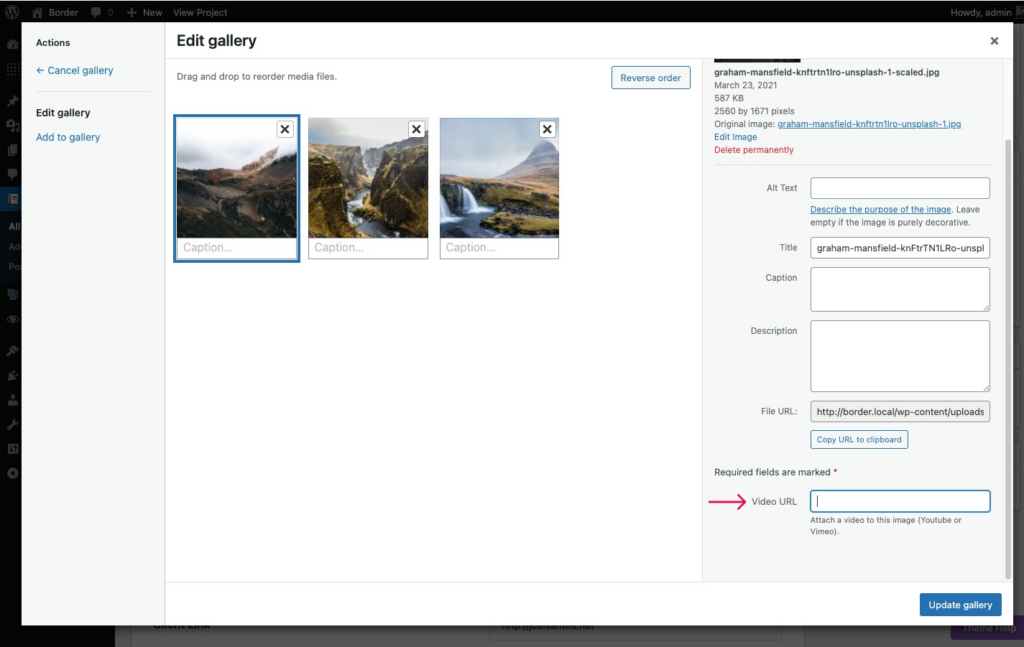
Adding videos to a project
Every image from the project slider can behave as a holder of a YouTube or Vimeo video.
To add a video, from the edit gallery modal window, click on an image, and in the right sidebar, you will see an optional Video URL input field. Paste your YouTube or Vimeo link in that box.
Projects specific options
When creating and editing a project, under the editor panel and the Project Details, you have a series of settings that allow you to control how the images and galleries show up. Here are the options:
- Client Name — Allows you to enter the client name, which will be displayed in the project details;
- Client Link — Allows you to enter the client link, which will be displayed as a hyperlink in the Client Name section;
- Template Style — Allows you to choose between Full Width Slider, Sidebar Right, and Classic;
- Image Scaling — Allows you to control how we will layout the images in the given screen space of the slider. The Fill setting scales the image to fill the slider container (recommended for landscape images). The Fit if Smaller setting scales the image to fit only if the slider container size is less than the size of the image. The Auto Height scales the container to fit the full-size image;
- Show Nearby Images — If enabled, you’ll avoid having empty space on the sides of the image when using portrait images;
- Slider Autoplay — Allows you to set the slider to start automatically when the page loads. Once activated, you have the option of choosing the Autoplay Delay Between Slides (in milliseconds);
- Exclude From Archives — You have the option of not displaying this particular project in the portfolio archives (main, categories, etc.).
That is all about creating projects. We hope you enjoy the tools we have designed to help you beautifully showcase your awesome creations.