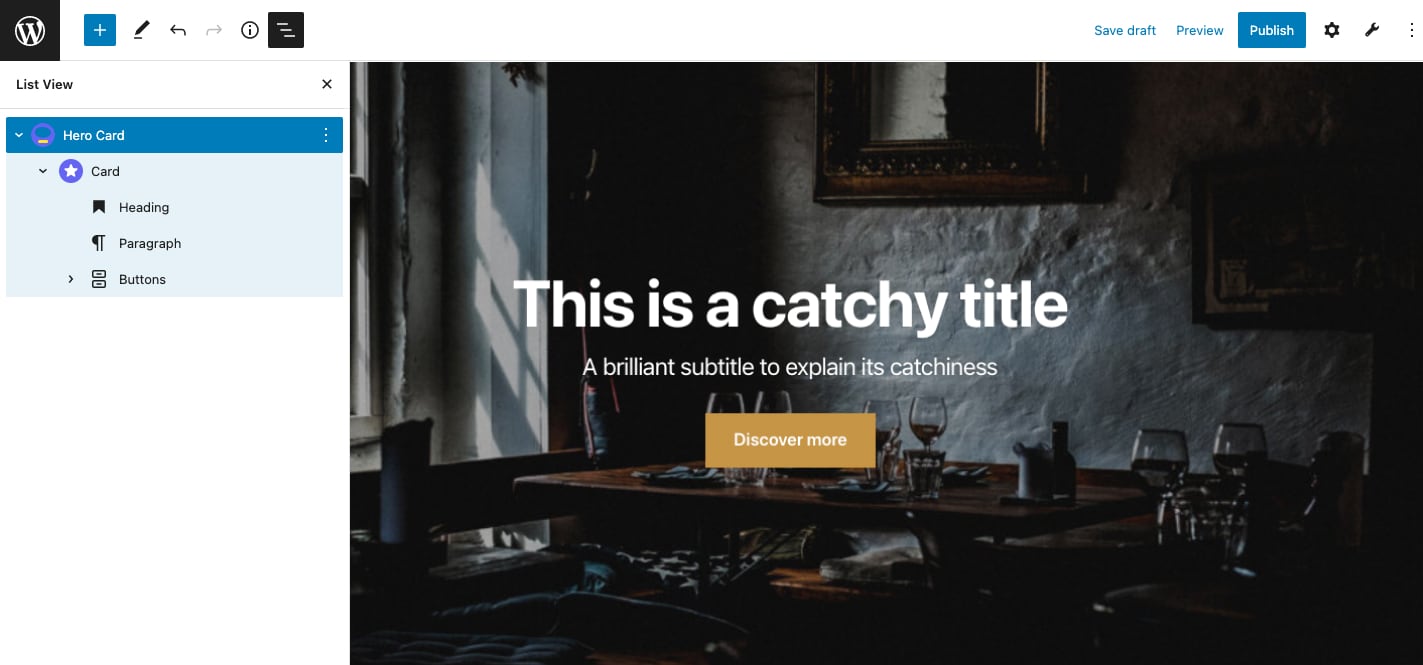
Hero Card Block
Using Hero blocks
A Hero Card block is usually the first thing your visitors see, making it a great spot to get them acquainted with your catchy content. Controlled by a smooth parallax scrolling and featuring a fullscreen background image or video, this is the perfect place to make a great first impression on your visitors.
Online, you can also find this block mentioned as Cover, Banner, or Poster, and it’s fundamentally the same concept. To learn how to use a Hero Card block on your site, follow the steps in this guide.
Add a Hero Card block
To add a Hero Card block to your content, click the ⊕ inserter button inside the editor and search for “hero.” Alternatively, you can just type /hero and press enter.
📝 Add Content
By default, each Hero Card you add comes with three default blocks: a Heading, a Paragraph, and a Button. While you have the flexibility to insert any other blocks, we recommend you leave room for the images in the background to shine too.
🌇 Add a Background Image
Use the Change media button from Toolbar and select Edit Gallery to add your image. It’s best to use high-resolution images at least 1500 pixels wide.

Because the size and shape of the Hero Card depend on the size and shape of the visitor’s screen device, your images will be cropped on some screens. Try to use images with the subject near the middle so that the important part is always visible. Read more on how to choose the right size for hero images.
🎬 Add a Background Video
If you’re into motion, you can insert a self-hosted video to create a looping visual element behind your content.
To add a video:
- Click the Change Media button and select Add Video from the dropdown.
- Drag your video file from your computer to Upload or select one you already uploaded.
- Click Select to insert it.

🎨 Customize the Design
You can customize the design and behavior of the Hero block by using the Toolbar above the selected block and the Settings sidebar.
Change the block’s alignment
You can change the alignment of all the blocks inside of the Hero Card by using the dedicated option from the Toolbar.
Customize the design
The right panel contains a list of available settings to change various block parts.
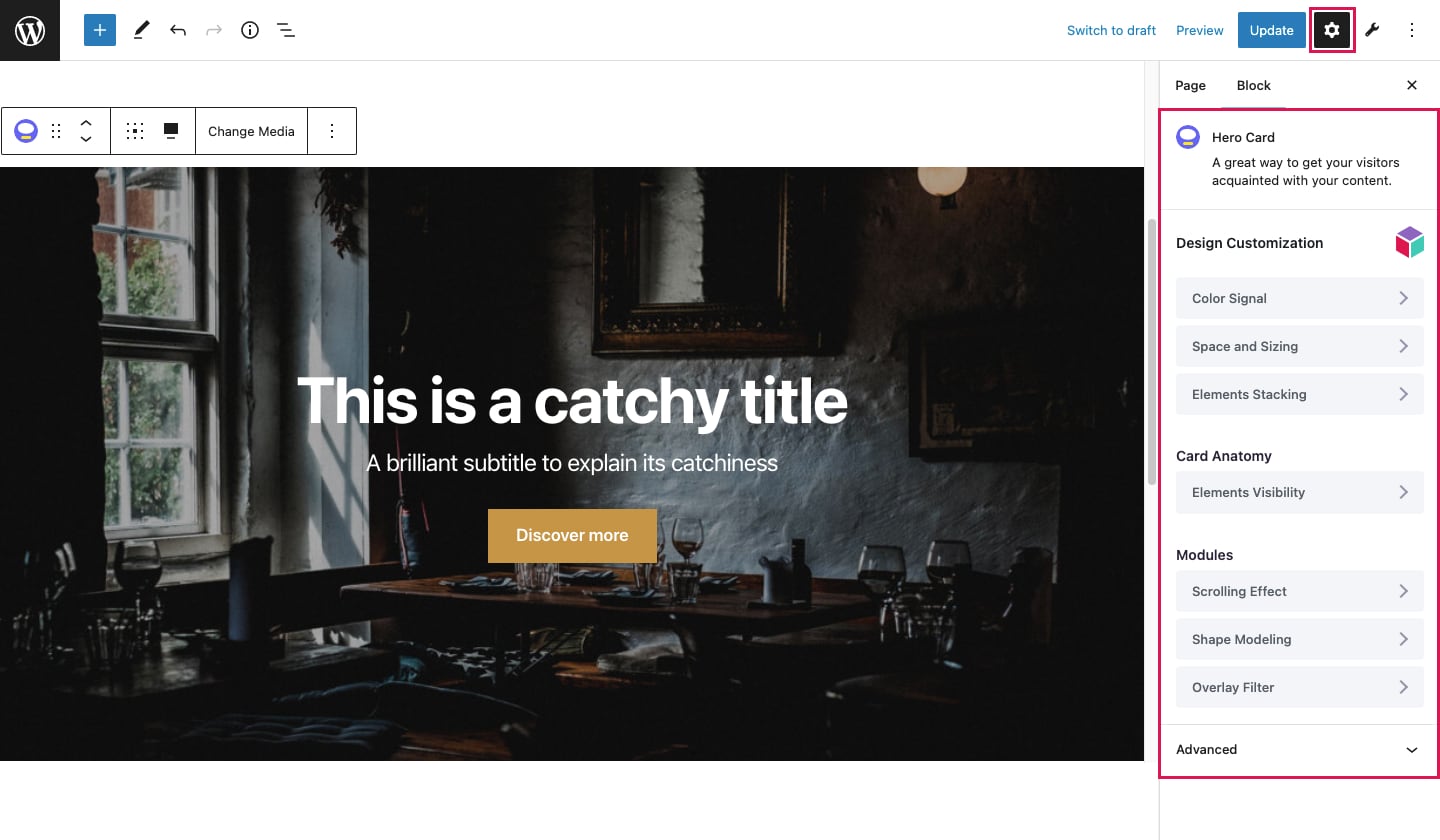
Among them is the Design Customizations section. This includes settings like:
- Color Signal — use it to change the color of the elements inside the Hero Card (e.g., the color of your heading, button, etc.). The available colors are loaded consistently through Style Manager, so they match your overall site design. Learn more about how to use the Color Signal tool.
- Space and Sizing — change the spacing of the Hero Card in relation to other blocks from the page (e.g., spacing between the Hero and the block above or below it). An important option is the Minimum Container Height that you can find in the Settings tab, through which you can change the height of the Hero Card.
- Elements Stacking — you can change how the elements inside the Hero (the background image or video, heading, paragraph, buttons, and others) are loaded. To benefit from the Hero Card layout, leave the Stacked option enabled.
Change the visible elements
The next section refers to the Card’s Anatomy and includes the Elements Visibility control. With this setting, you can choose what elements to load inside the Hero. The options are:
- Media — show images or videos in the Hero.
- Inner Content — allows you to add all sorts of elements inside the Hero (headings, paragraphs, buttons, etc.). Disabling it will hide all content and show the Media background alone.
- Collection Title and Collection Subtitle — to add a title and subtitle above the Hero as a way to introduce the next section.
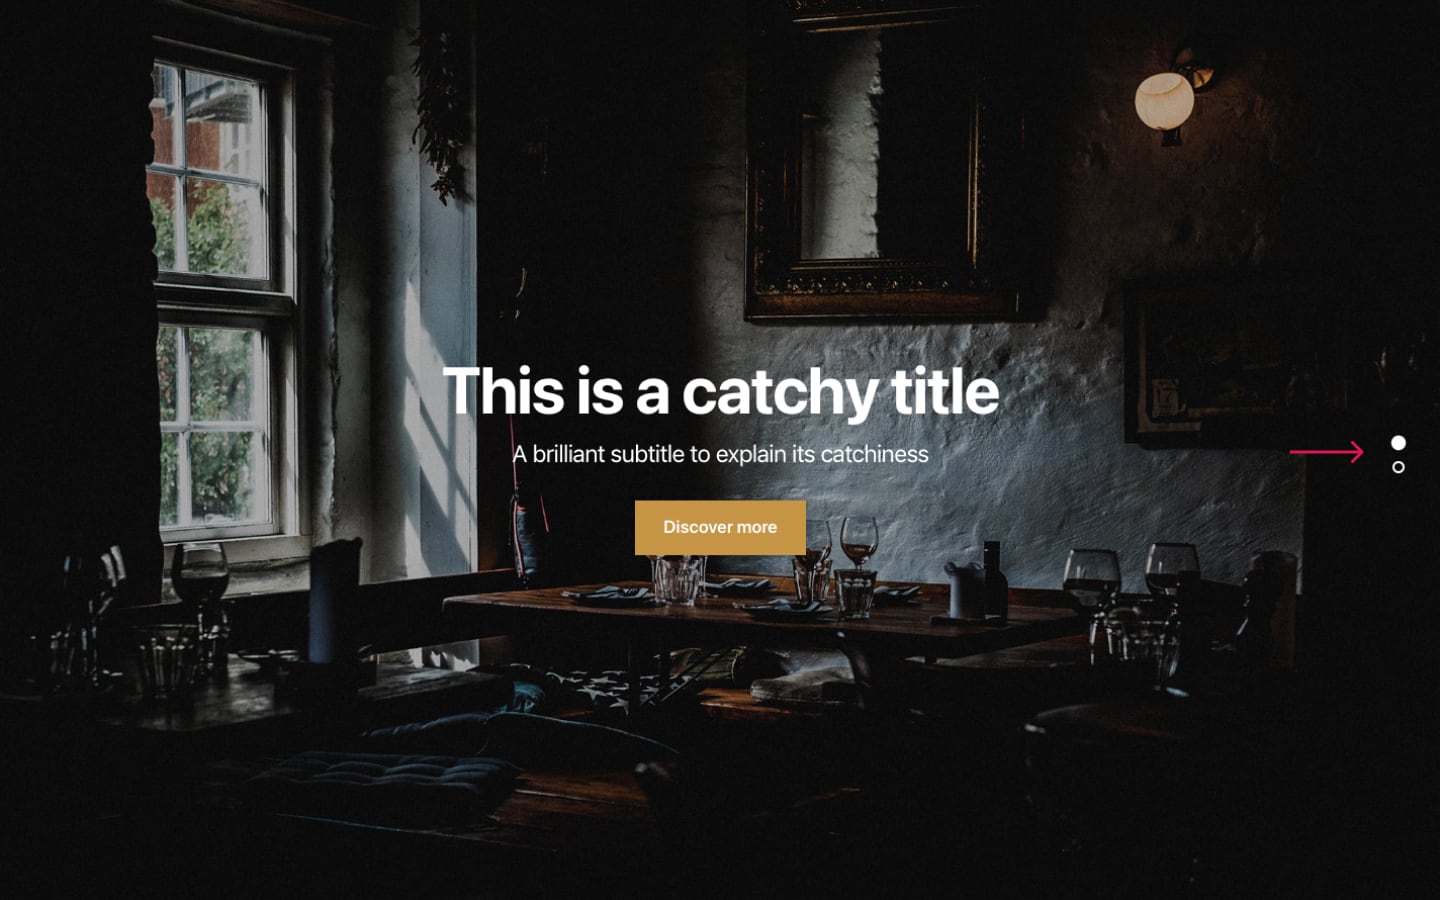
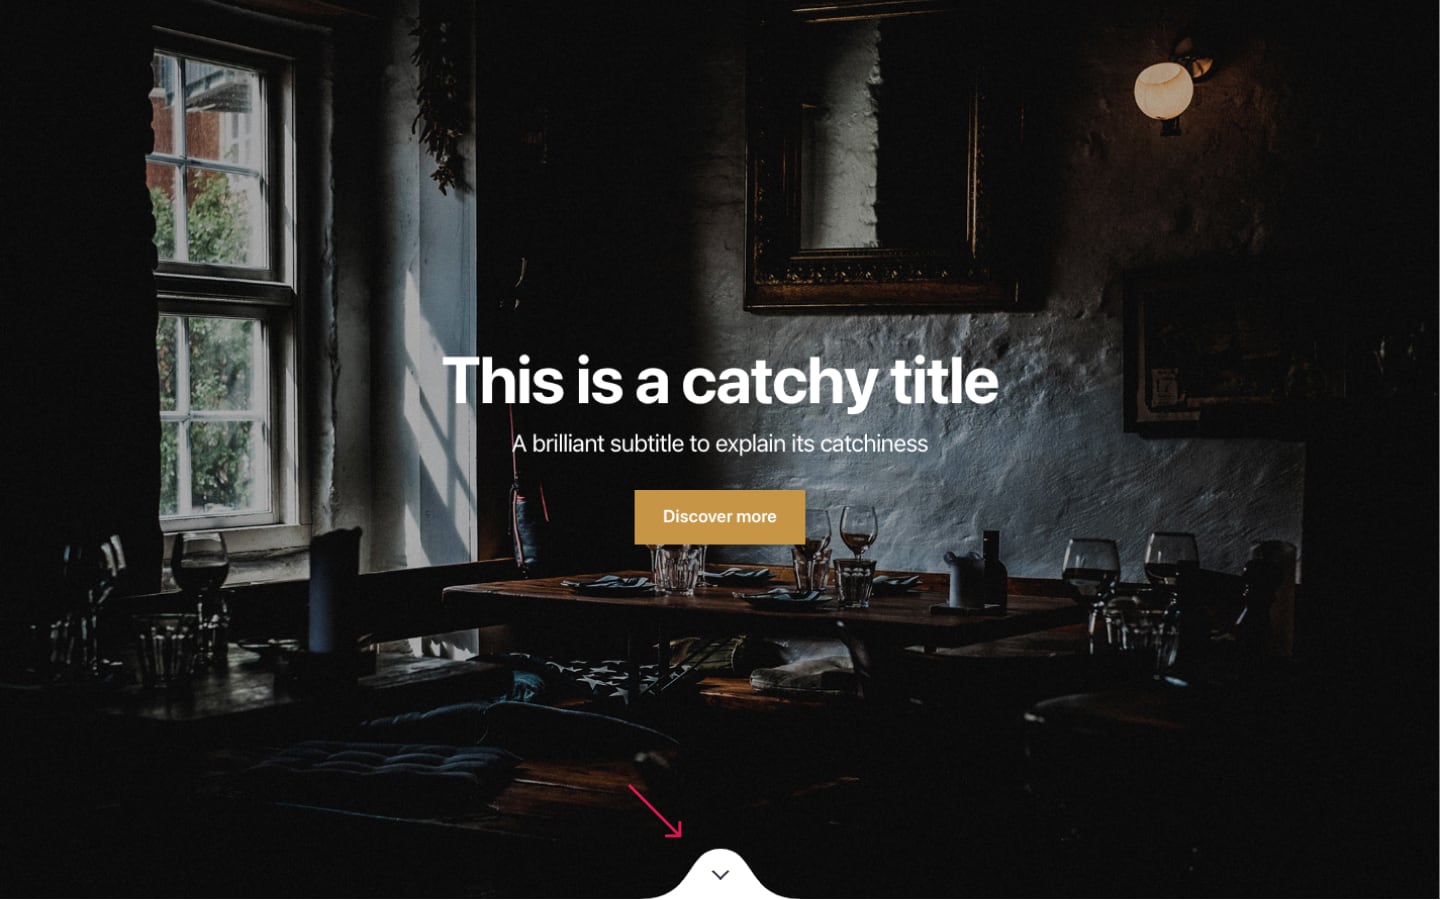
- Position indicators — use it to show small dots on the right side of each Hero block on a page. This option only works if you enable it in the first Hero on the page. See the example below.
- Scroll Indicator — adds a scroll indicator at the bottom of the Hero block. This only works on the first Hero on the page and not on the others. See the example below.
Personalize the background image or video
The following Modules section offers the ability to customize the background image or video by changing things like:
- Scrolling effect
- Parallax — a simple scrolling effect for your background image or video for better storytelling
- Doppler — an advanced Parallax effect that gives even more life to your static photos by slowly panning and zooming in to give emphasis or create drama
- None — disable the motion effect and keep the image static as you scroll
- Shape modeling — use it to change the shape of the background image or video and add a blob decoration for a unique effect. Browse around the Presets, or go to the Settings tab for advanced edits.
- Overlay filter
- Unitone — adds a black filter on top of your original image to dim the image brightness.
- Duotone — adds a special editing effect to your image by mixing colors from your Color System.
- Overlay Filter Strength — control the intensity of the Unitone and Duotone effects.
Extra: Add a Slideshow
If you want to display more than one piece of content in a single space, you can extend the Hero block by adding more media items and transforming it into a Slideshow block.