Open Hours Block
To help people plan visits to your store or venue, you can display the availability and opening hours on your site. To help you out, we created the Open Hours block that provides several ways to show your availability.
Add the Open Hours block
To add an Open Hours block to your content, click the ⊕ inserter button inside the editor and search for “Open Hours.” Alternatively, you can just type /openhours and press enter.

Now that the block is on your website, you can start customizing it by adding your schedule and choosing between the different ways it can be displayed.
Configure your schedule
On the right settings panel, you will see a setup option. Click on it and write your business’ opening hours in a wide range of formats, whichever you feel is more comfortable.
Let’s say that you run a coffee shop that’s open from 7:30am to 3:00pm, Monday through Friday, and you’re opening at 9:00am on Saturday and Sunday. In the setup area, you can write any of the following:
m-w 10:15am-2am; fri 12pm-11pm;
mon, tues, wednesday 1015-2; f 12:00p until 2300;
mon-tu, w 10:15 A.M.-02h00; f 12:00 until 23:00;
m-f 10-12
10:15am-2am m-w; 12pm-11pm fri,su
Here’s a video demonstrating the different formats in which you can add your schedule:
Customize the design
By navigating to the Display settings from the block settings panel, you can choose between two ways of displaying your open hours:
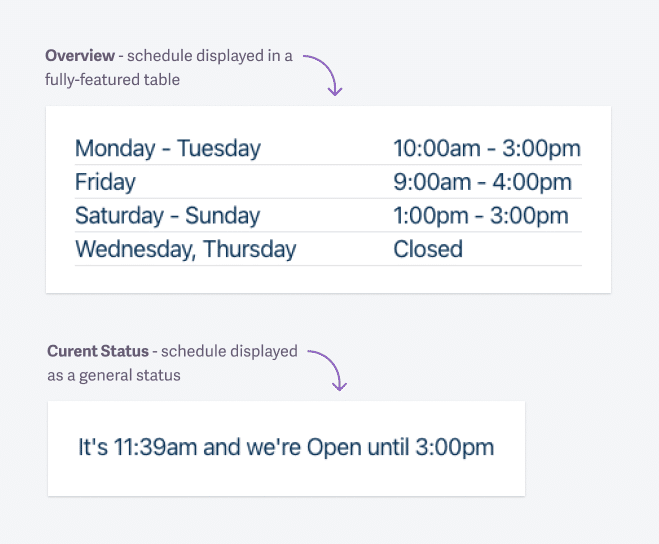
- Overview – in this default state, your schedule will show up in a fully-featured table for each day of the week. You can further customize it depending on your needs by tweaking the options below:
- Customize the ”Closed” label – you can change the text that marks when you are closed on a specific day of the week. Use it to bring some of your brand and personality forward or as an opportunity to write the label in your own language;
- Compress Opening Hours – helpful if you prefer to show a range for the days where you have the same schedule (e.g., Monday — Friday 9am – 3pm)
- Hide Closed Days – as the naming implies, you can choose to hide the days when you are not open for business;
- Use Short Day Name – to save space or just for the sake of it, you can choose to display the shorter version for each day of the week (e.g., Mon instead of Monday);
- Time format – customize the way the time is displayed in your Open Hours block by choosing one of the supported time formats from WordPress (e.g., 1pm instead of 13:00).
- Displaying the Current Status – this allows you to set up a general status that informs your customers if you’re open or closed at that particular moment when they are visiting your website. With this option enabled, you can customize the:
- Open Note – displayed to your website visitors when you are open;
- Closed Note – displayed when you are closed.
In order to provide more flexibility, we developed a few replacement tags you can use in your notes. They will use data from the schedule you’ve set up previously. For example, writing It's {time}, and we are open until {today-end-time} will display something like It's 1:25pm, and we are open until 6pm.
You can see all the available tags by clicking the “See available tags” link right above the Open Note (see screenshot). Below is a complete list of the available tags:
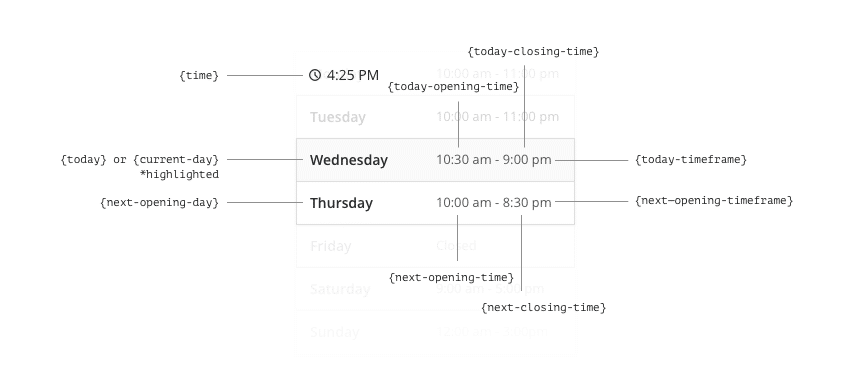
| Tag | Description |
|---|---|
| {time} | Will be replaced by the current WordPress installation time. |
| {today} | Will be replaced by the name of the current day. |
| {today-opening-time} | Will be replaced by the current day’s opening time. |
| {today-closing-time} | Will be replaced by the current day’s closing time. |
| {today-timeframe} | Will be replaced by the current day’s open-closed timeframe. |
| {next-opening-day} | Will be replaced by the next day’s (in which you will be open) name. |
| {next-opening-time} | Will be replaced by the opening time of your next open day. |
| {next-closing-time} | Will be replaced by the closing time of your next open day. |
| {next-opening-timeframe} | Will be replaced by the open-closed timeframe of your next open day. |
Examples of where to use the Open Hours block
Since everything in Rosa LT is based on Editor blocks, you can add the Open Hours block anywhere you want on the website. Below are a few ideas to get inspired.
In the Footer
Adding the block in the footer is a great way to make sure that no matter the page people visit, they will see your availability at the bottom.

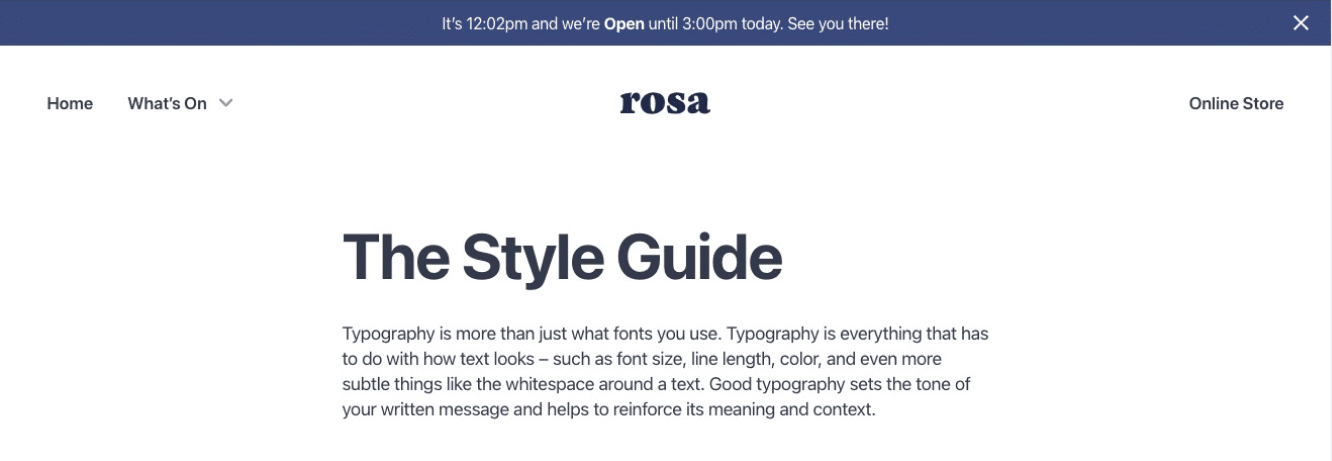
In the Announcement Bar
Another great way to signal your availability across your entire website is by using the Open Hours block inside the Announcement Bar. We recommend using it with the Current Status display option enabled to keep it limited to one row of text.
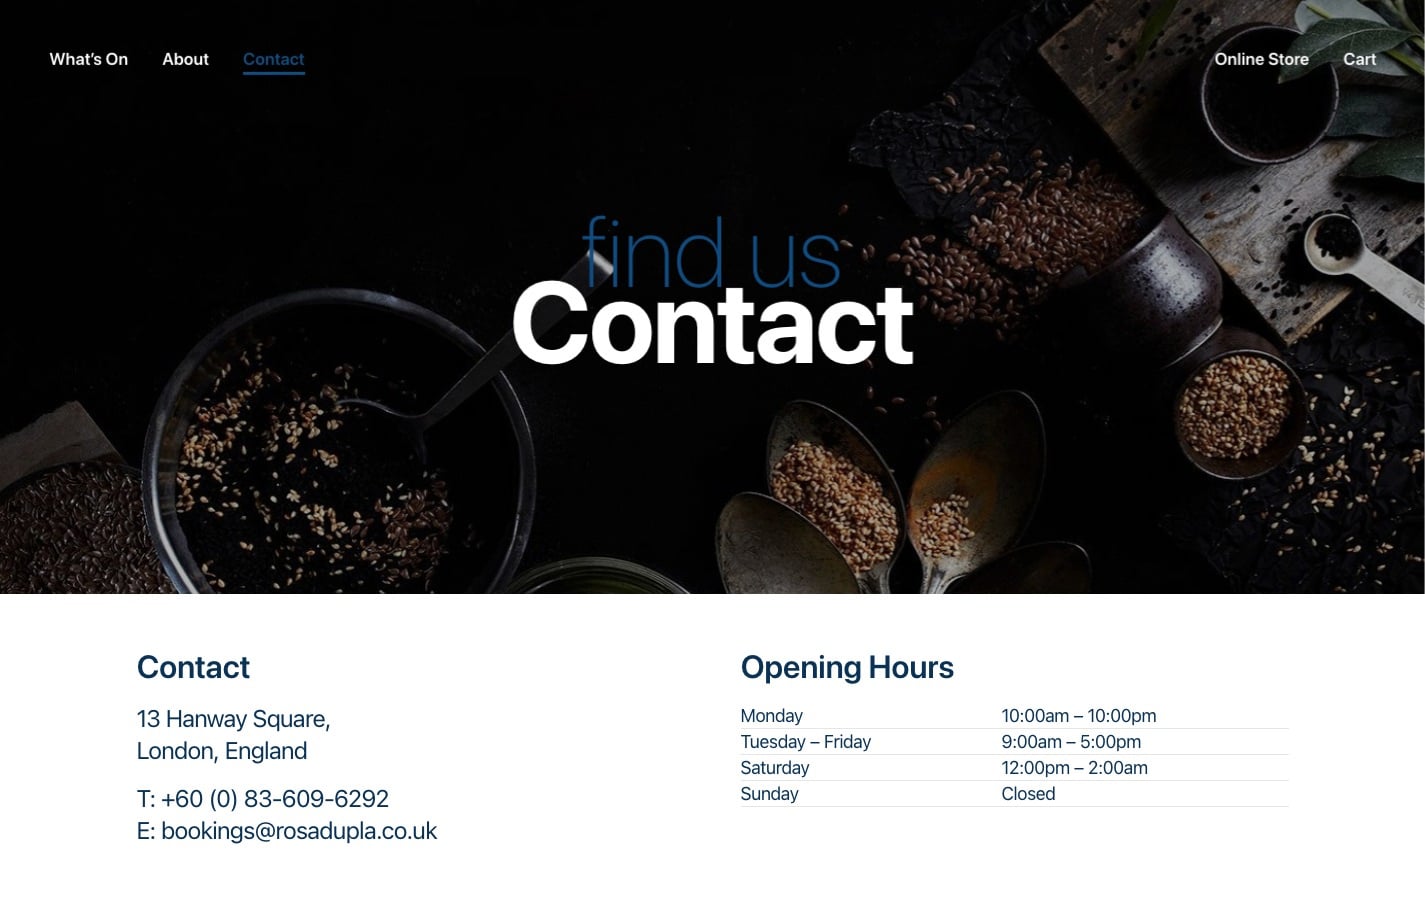
On your Contact page
Since that’s where people often look for contact information, directions, and schedule, it makes sense to consider adding the Open Hours block on the page.
Now that you have a better understanding of this block, the sky’s the limit in terms of where and how you choose to display your schedule.