Using the Front Page template
With Vasco, we provide a layout that will help you organize your content and customize your homepage until it matches your needs. All you have to do to enjoy that flexibility is to enable the Front Page template.
How templates work
A template is a starter layout that allows showing your content through numerous Widgets. By using the Front Page template, you enable the possibility to add different Widgets on your website’s homepage. You can learn more about widgets from this article.
For example, the front page of our Vasco demo is built with the Front Page template.
Setting up the Front Page template
Now that we described what a template is and how it can be used, let’s start setting it up. Please follow these steps:
Step 1 — Create the page
From your WordPress Dashboard, click on Pages → Add New and name it “Home” or alike.
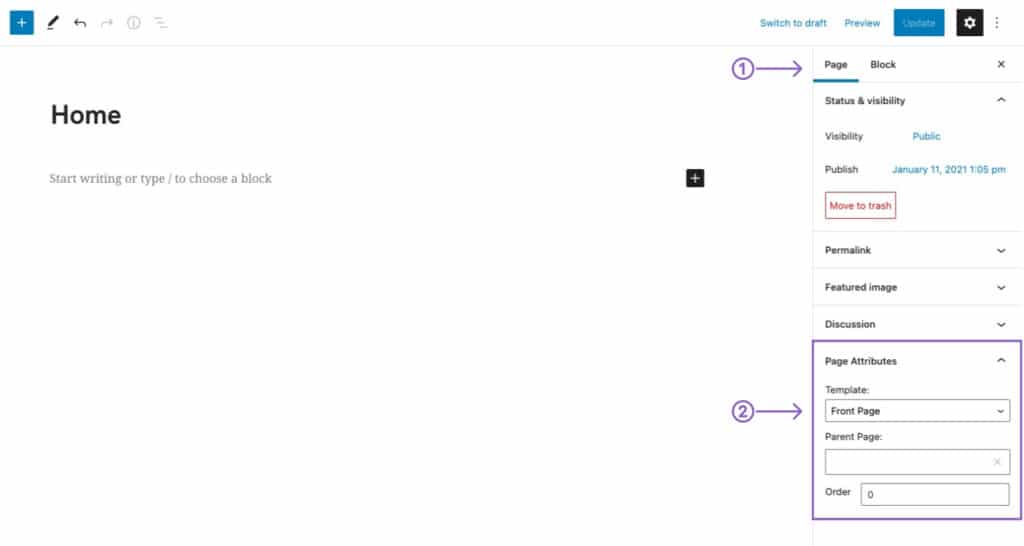
Step 2 — Set the”Front Page” template
From the right settings bar, select the Page option and, from the Page Attributes section, set the template to “Front Page.”

Step 3 — Set a static Front Page
To finish this up, let’s put the above-created page on the front page. By default, WordPress displays the latest posts there, but you can change that and show your new “Home” page by following the instructions below:
- From your WordPress Dashboard, go to Appearance → Customize, and click on the Homepage Settings tab.
- Select the “A static page” option, then choose your new page from the Homepage drop-down.
- Click on the Publish button to save your settings.
Step 4 — Add the widgets
Now it’s time to add some widgets to the homepage:
- From your WordPress Dashboard, go to Appearance → Customize.
- In the menu that appeared on the left, go to the Widgets section.
- Choose any area you would like to add widgets to.
- While editing an area, click on the “Add a Widget” button. From the menu that will appear on the right, select any widget that you would like to add and start customizing it.