Adding Extra Social Media Profiles to Listings
Listable, through the WP Job Manager plugin, comes by default with support for only one Social Network—Twitter. To add extra Social Profiles or even for other kinds of fields, we’re recommending the Field Editor plugin, which will allow you to create and customize all form fields.
To add new fields to your listings, you need the WP Job Manager – Field Editor plugin (sold separately). Even if you can manually manage those fields, we recommend this plugin due to its intuitive user interface. Plus, we’ve added the necessary styling, so you only need to add the new fields and output their values to the correct location.
Step 1 — Install the Field Editor Plugin
You must first purchase, install and activate the WP Job Manager – Field Editor plugin.
Step 2 — Add a New Field
Navigate to Listings → Company Fields in your site’s dashboard, and from the top, click the Add Company Field button.
Let’s make the configuration for a Facebook profile field. Fill up the configuration as illustrated below:
- Meta Key:
company_facebook - Type: Text Box
- Label: Facebook
Step 3 — Configure the Output Location & Details
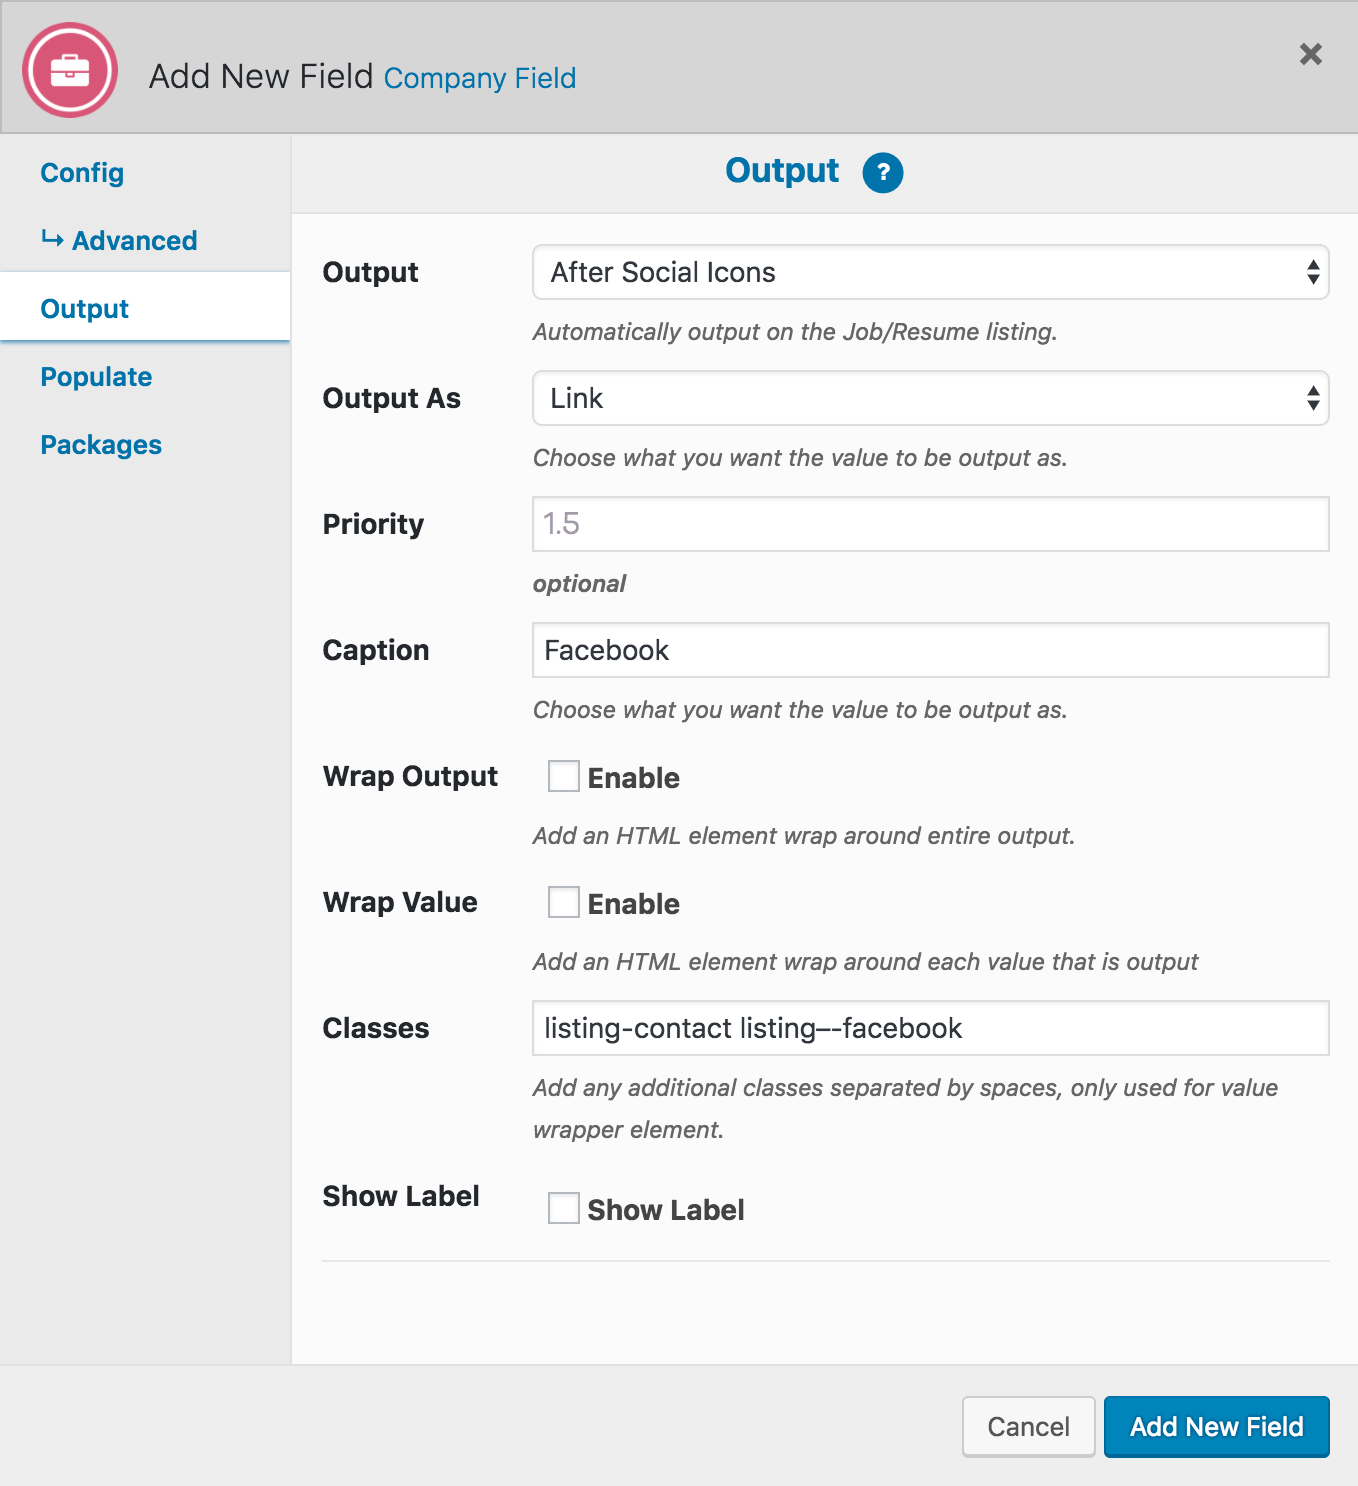
Now, since we have a field that collects data for listings, we should output its value near the other social media profiles. Let’s move to the Output tab from the left sidebar and fill up the details as shown below:
- Output: After Social Icons
- Output As: Link
- Caption: Facebook
- Classes:
listing-contact listing--facebook. Use double dash (-) between listing and Facebook.
That’s it! The newly created field will show up on the listings page after the already used Twitter field.

Note: you can add as many fields as you want, but you need to change the CSS class to listing–socialnetwork.