Creating a one-page website
Each page in Rosa 1 has a parent page that stays at the top and a list of child pages that are displayed one after the other. This is done in order to have multiple parallax sections on the same page.
For Rosa 1, creating a one-page website means nothing more than adding multiple child pages to a parent one. Here you can find a demo of a one-page website using Rosa 1.
This means that in order to achieve a one-page website, we need three elements: the right page structure, page ids, and a navigation menu. Below I’ve detailed how to tackle each of these elements so that you have all the necessary info to start building everything yourself.
Step 1: Create the page structure
The first step is to create and publish the parent page. Also, don’t forget to check this page in the Parent field on the right side editor toolbar (under the Page Attributes), and click on the Update button to save the changes.
Once you’ve created the top level Parent Page with a list of Child Pages, you will end up with something that looks like this:
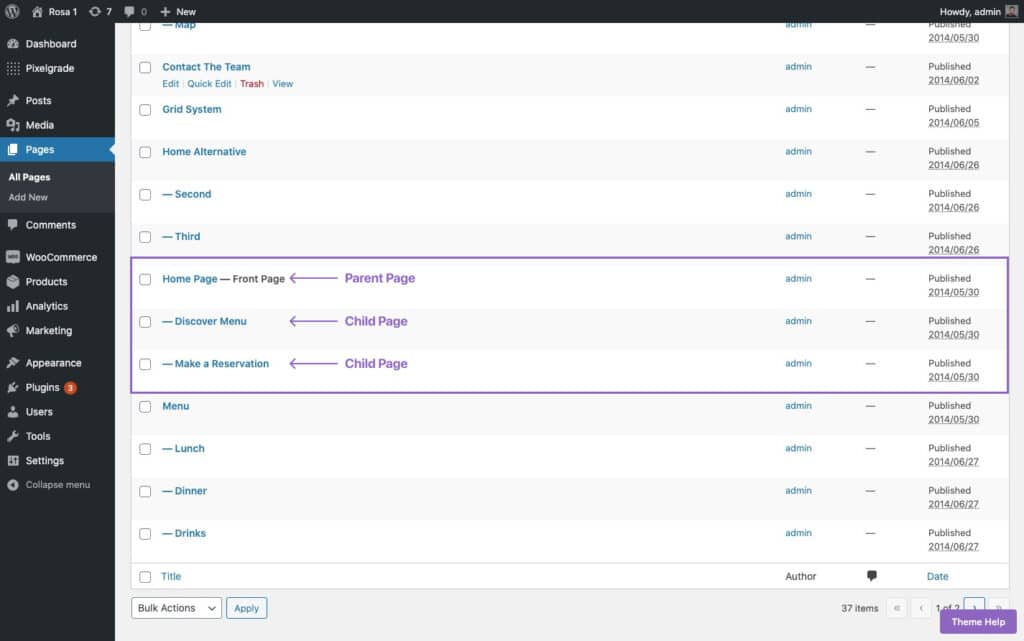
As a result, your home page structure will look similar to:
- Parent Page (Home Page)
- Child Page 1 (Menu)
- Child Page 2 (Reservation)
- and so on…
Step 2: Create a menu and add links to page sections
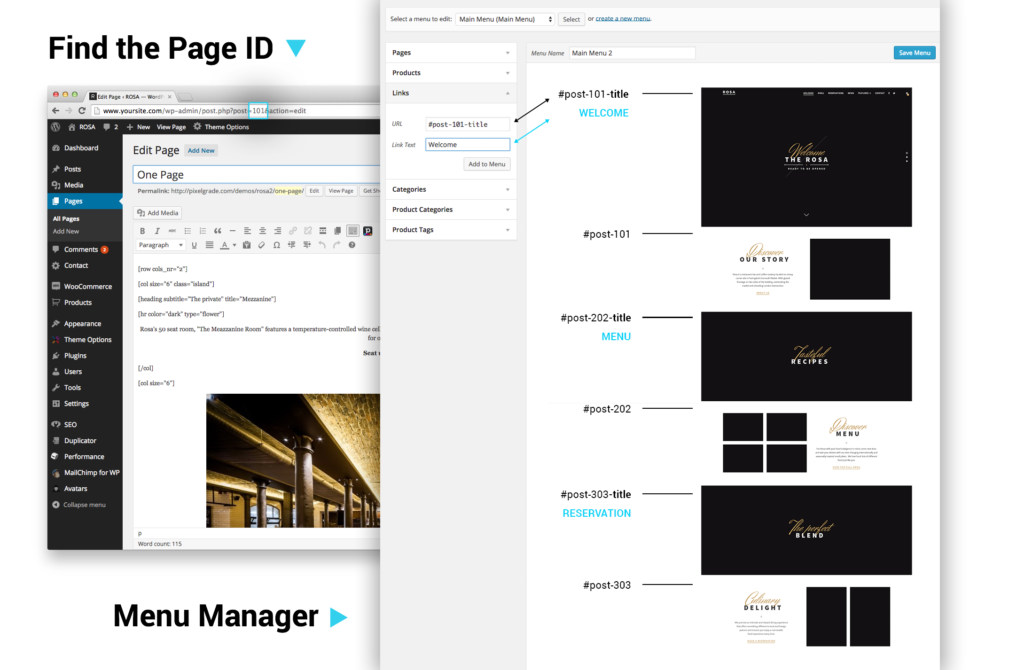
The first step is to find your page IDs. All pages have an unique ID and they will act as the links to that specific page or child page. Here you can find a detailed article that explains how to identify the ID for each page.
The next step is to create the menu links. To do that, follow the steps below:
- Go to WordPress Dashboard → Appearance → click on Menus.
- Add a new menu and assign it to the “Main Menu” location. Please read this article about how to properly manage the navigation in WordPress. In the same article you can learn how to display the menu at the top of your page;
- Click on Custom Links on the left panel and add a menu item for each parent page and child page that you want to scroll to:
- In the URL tab write
#post-id-titlewhere “id” is the Page ID that I mentioned earlier. You will end up with something link this:#post-867-title - Note: You can skip the
-titleif you want to link directly to the content or if you don’t have a featured image. - In the Link Text area, write the text that you want displayed for the menu item (e.g., Reservations). Here’s an example.
- In the URL tab write
- Click Add to Menu and repeat the process for all the anchor links you have on a page. When you’re done, click on Save Menu.
Below is an illustration to help you better understand how the menu items are linked to pages:
Access your on-page links
You can link to specific sections inside the page by adding the child page URL using the Insert Link button or adding it within a shortcode, preceded by the hash symbol⟨#⟩.
Below is an example of how to find your child page URL:
For example, if your child page URL is “#reservation”, you can link directly to that section by adding #reservation in the URL area of a text or button.
If you want to share the anchor link outside of your website or from a different page of your website, add the anchor at the end of the URL like this: https://example.com/#reservation. Anyone clicking that link will be directed to that specific section on the page.