Adding an eCommerce Store
Setting up an eCommerce store is an increasingly way of making money online. The good news is that Border theme offers integration with WooCommerce — the most popular plugin that allows you to create a shop on your WordPress websites. This ar will show you how to set up an online store where you can list and sell both physical and digital products.
Note that this solution is aimed at photographers/designers with a few products to sell. That’s why to declutter the default WooCommerce design interface; we dropped the support for some features that we considered worthless for such a store (e.g., reviews, search).
Install WooCommerce plugin and start the Setup Wizard
One of the most incredible things about WooCommerce is that it’s not just the most powerful tool to create a shop, but their authors constantly improved the way of use and made it incredibly user-friendly. Right after the plugin is activated, a Setup Wizard starts, and you have to fill in the required details. The Setup Wizard takes care of everything for you — it creates the Shop pages, helps you add all the details about the Shop, about the products, and the payments, and it even allows you to import demo products so that you can have a starting point for your shop.
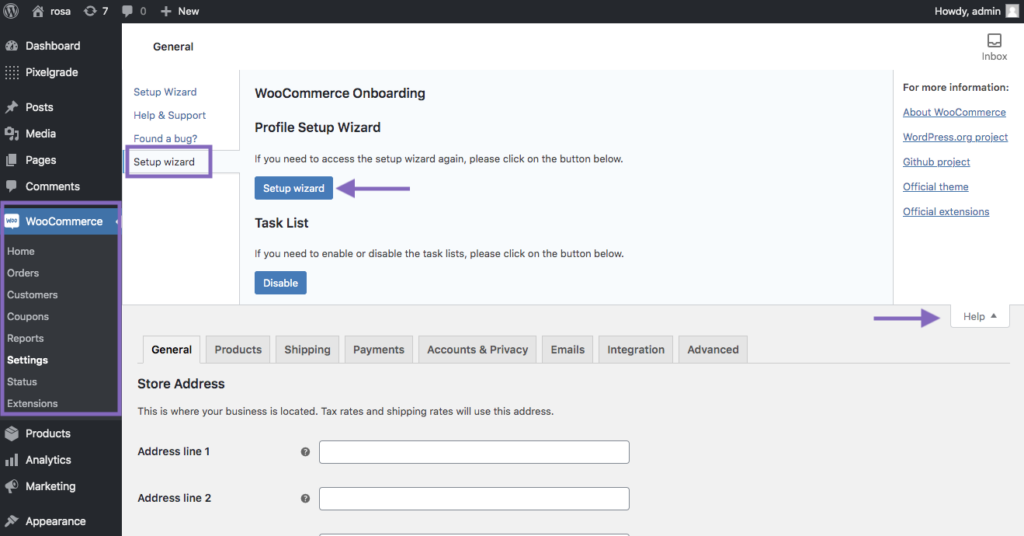
All these details can be edited whenever you want by going to your WordPress Dashboard at the WooCommerce → Settings section. Also, it’s good to know that the entire Setup Wizard can be restarted if needed. To do that, when you are on the WooCommerce Dashboard, click on Help Button from the top bar and click the Setup Wizard button:

Make Money with Border
By adding the Printful service, you can automatically print and sell your posters, t-shirts, and more without lifting a finger. You can learn more about it by visiting their Official Guide.
Now you are ready to delight the world with your amazing products. 🙂