Translate your website with Weglot
Besides the improved browsing experience that comes with translating your website, you can open your site to other people and markets. Depending on your goals, this can mean an increase in the number of fans, sales, downloads, and more.
This feature is especially great if your website or business targets multiple countries or if its located in a country with more than one official language (e.g., Canada, where both French and English are official languages).
One example is a restaurant in a popular vacation spot. People traveling tend to search in their native language when they are looking for a place to eat or visit. By having a multilingual website, travelers can find the business, browse and understand its offer, and pay a visit. Without this feature, the restaurant would most likely be missed.
The good thing about WordPress is that is has a great community of supporters and companies who offer different solutions to solve this problem. Because there are so many alternatives, in this article, we are going to focus on Weglot, a popular translation plugin with over 30,000 downloads.
We put our testing hats and went through all the steps required to get your website translated into other languages using Weglot. Go through each step and be certain that you’ll have all the right tools to start translating when you reach the end.
Step 1: Install the Weglot plugin
- Install the Weglot plugin by going to Plugins → Add New → Search for “Weglot”→ Click Install Now and then Activate
- The next step is to register for a new account and get your API key. You can also find the registration link by going to Weglot in your WordPress dashboard and click the link located in the API section (screenshot)
- Add the API key from your Weglot account to the plugin’s settings in your WordPress dashboard (screenshot)
- Next, choose the Original and Destination language(s) and hit Save. You’ll unlock several options on how you want the language button’s design and position, and any URLs you want to leave out from being translated.
Step 2: Create and edit your website translations
Weglot automatically translates your website once you chose a destination language in settings. There are two ways to edit those translations:
1. Using the Visual editor – go to your Weglot Dashboard → Translations → click “Visual editor.” To edit the text, you can hover over it and click the blue pencil icon.
2. Use the backend translations list interface – from your Weglot Dashboard, click on “Translations.” Select the language pair you want to translate and start editing. You’ll see a side-by-side list of the original text and the translated version. Use the navigation and search options to find specific content.
You can find more details about all the ways you can edit your translation, and the features packed in the Weglot plugin by watching this video.
Step 3: Add a language switcher to your website
By default, Weglot adds a floating language switcher in the bottom right corner, as shown here, but you also have four other display options:
- In a WordPress menu
- As a WordPress widget
- With a shortcode
- In your source code
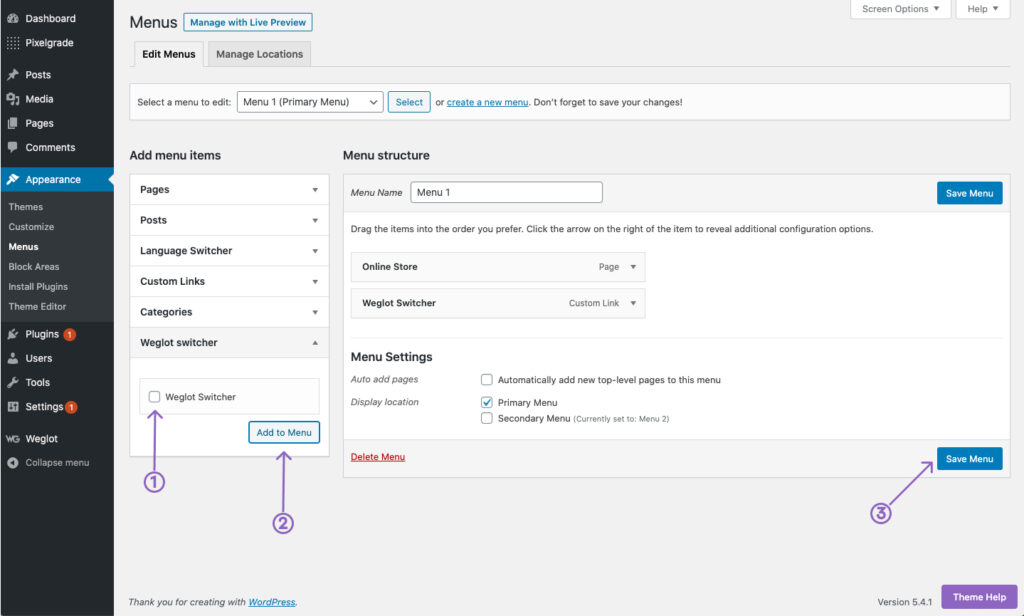
To add the Weglot language switcher in the menu you must go to Appearance → Menus -> Select the Menu you want to edit. From the left panel, click on the Weglot switcher and add it to the menu.
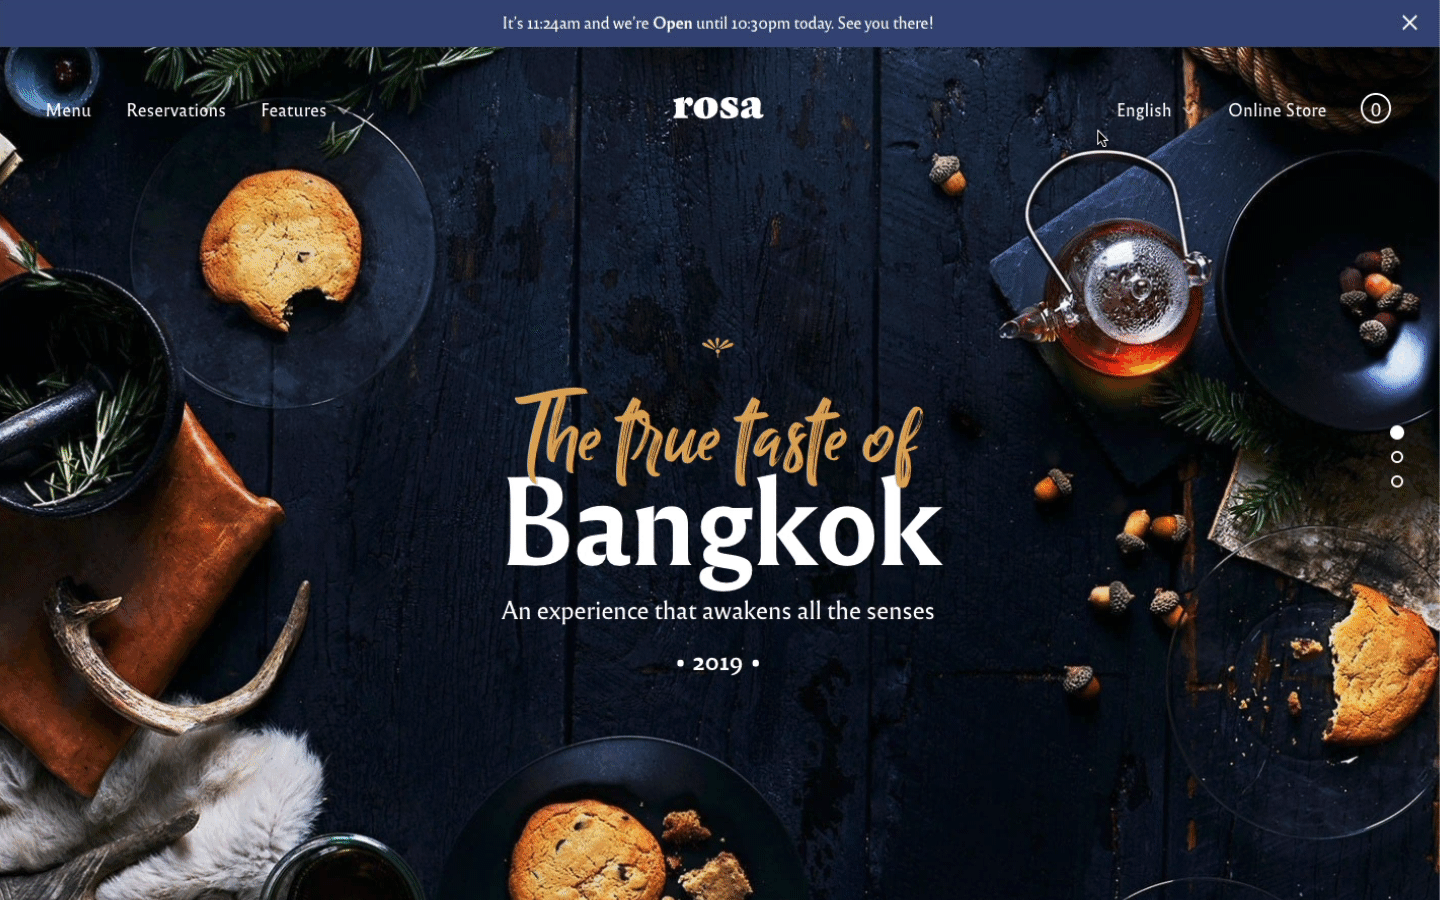
This way you’ll get a nice drop-down menu language switcher effect like this:
For all the other ways you can add the language switcher, check out this document. If you need to translate more than 2000 words or want to use more than one additional language, you can upgrade to Weglot PRO.
FAQs
Are your themes compatible with Weglot?
Yes, all our themes are compatible with Weglot.