How to insert Ads on the Blog Archive Page
Making money as a blogger is a common strategy for those who plan to invest in their online presence. There are several ways to achieve this kind of financial security, and one of them is by inserting ads within your content. We highly recommend you to choose the type of ads carefully by always thinking of your audience and their particular needs. In the end, nobody wants to be part of some useless noise, right?
In this article, we walk you through how you can easily insert ads on your Blog Archive Page for more engagement.
We created a step-by-step guide that will help you understand how to get the job done by yourself.
Step 1 — Download the Ad Inserter Plugin
To make things more accessible for you, we researched and picked the best option — the Ad Inserter plugin — a powerful tool for ad management.
Please note that by using this plugin, you can insert ads in various places on your WordPress site, but in this article, we’ll focus on the Blog Archive Page.
Log into your WordPress Dashboard, navigate to Appearance → Plugins and search for the Ad Inserter plugin (free). Click Install and Activate it.
Step 2 — Insert the First Ad on Your Blog Archive Page
The next details assist you in the process of inserting the first ad, so please follow them accordingly.
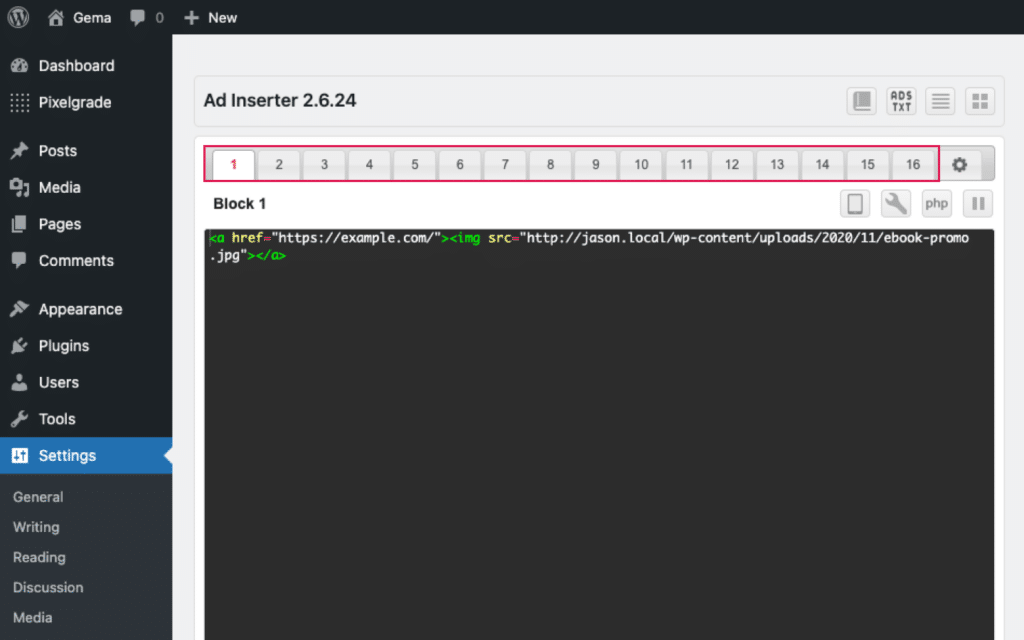
- Go to your WordPress Dashboard under Settings → Ad Inserter, click on Block 1 tab and insert your ad code (AdSense or any other) or a link to a banner with the format:
<a href="link URL"><img src="image URL"></a>.- Replace the
link URLwith the URL where you want to take people when they click your banner. - Replace the
image URLwith the URL of the image you want to load.
- Replace the
- Check the options to show the ad on the Homepage.
- Under the Editor, in the Insertion section, choose the Between Posts option. Right next to it, add a number to tell the plugin after how many posts you want the ad to show up. For example:
- Writing
3will insert the ad once, after the first three posts; - Writing
%3will insert the ad after every three posts (repeatedly); - Writing
3,7,10will insert the ad after the third, seventh, and tenth post.
- Writing
- In the Alignment section, choose the Center option.
- On the right upper corner, click on the ⚙️ to open the Ad Inserter General Settings button and add
grid__itemin the Block Class Name area. - Click the Save Settings button and enjoy your first ad banner on the Blog Archive Page.
If you want to place more than a single ad, you have to choose a different block or tab (that goes from 1 to 16) for each ad and follow the same steps.
Please note that you can also use other ad formats, not just static banners. We recommend starting with Ad Inserter Common Settings for a better understanding of how it works. For advanced features, please read the Ad Inserter’s documentation.