Adding a Newsletter Subscribe Option
To foster a community around your website means to have a precise and witty strategy. While social media covers half of this effort and it is more than welcomed, e-mail is more reliable in building trust. By offering an e-mail subscription, you raise the chances to keep an active dialogue with relevant people. Moreover, it’s another gateway for your audience to consume your content and share it with wider networks.
Popular options
There are plenty of newsletter services out there. Jetpack Subscriptions from Automattic is, by far, one of the basics and most convenient options available on WordPress.com as well.
Nonetheless, it’s not a classic subscription form. They handle the subscriptions and regularly send the new posts you just published on your website. It might be the right fit if you want to focus on creating valuable content, not managing subscriptions.
On the other hand, if you want to stay hands-on in this area, we highly recommend using MailChimp. Besides being a reliable and user-friendly tool with great flexibility, you can use it without cost within 2K e-mail addresses.
Now that you made your choice, here’s what you need to do next:
- Install the MailChimp for WordPress plugin.
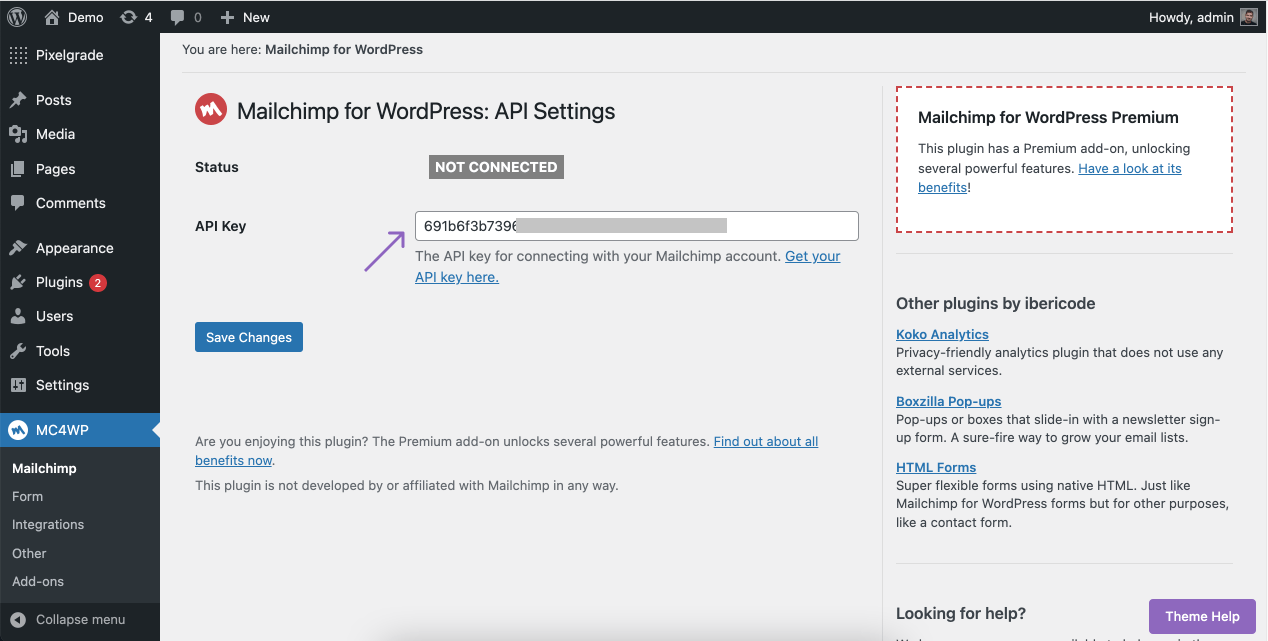
- Log in to your WordPress Dashboard and click on MC4WP.
- Get the API Key by following these steps and paste it into the API Key section.

Next, navigate to the Forms area and create your new subscription form. Give it a name and select the form fields you want to add. To further customize it, navigate to:
- Messages: customize the messages your visitors will see along the subscription process;
- Settings: choose the list to which people should be subscribed, enable or disable the double opt-in option, and more.
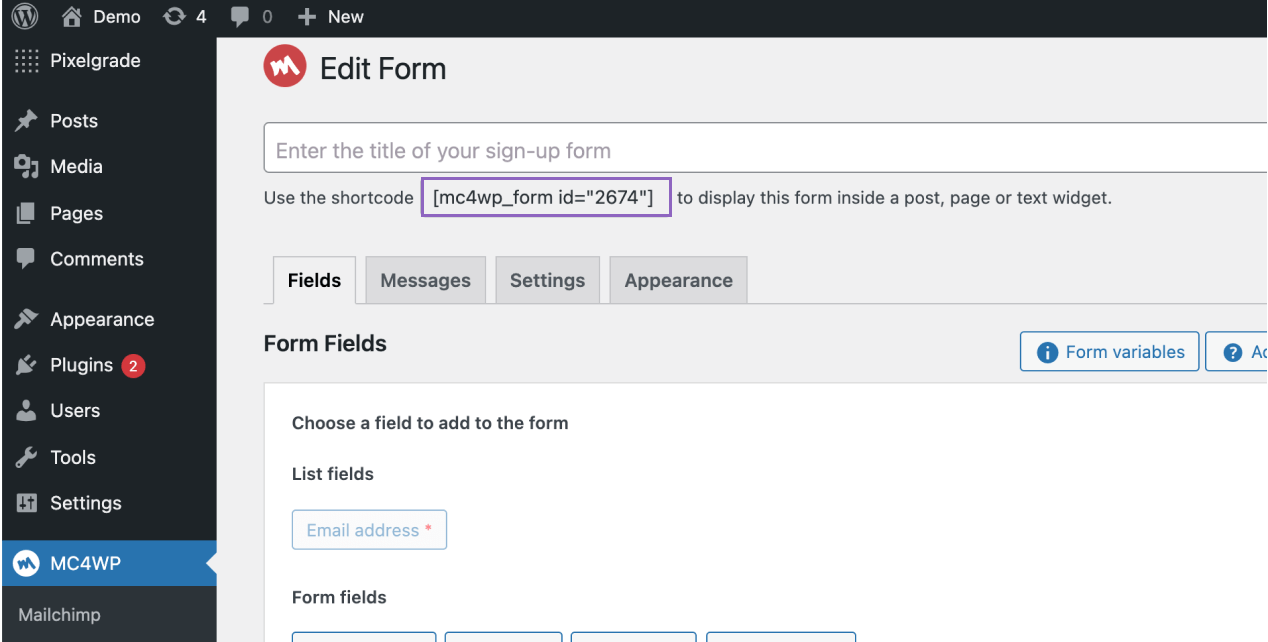
The final step is to grab the shortcode generated by the form you created and paste it inside a widget area or anywhere on the website.

FAQs
Which display options of the subscription are best?
It depends on your website’s profile. What’s important to keep in mind is the fact that nobody will subscribe from the first seconds of visiting. Let people read some of your content and get a clue about what’s in it for them. For instance, a good idea would be to display the popup on a single post only, after two minutes.
Do I have a limit regarding how many emails I sent?
No, you don’t. However, we suggest you keep a balance and don’t spam your audience. Let it know about things that matter, such as new blog posts, an interview you gave, a big thing you accomplished. Build trust one step at a time.
How can I make the newsletter field look like the one from your demo?
The newsletter form from the sidebar is made using the default settings of MailChimp. Just set everything up as explained in the paragraphs above, add a new Text widget to the sidebar area, and paste the shortcode.
If the style of the footer newsletter is the one that you’d like to have on your website, there’s one more change that you need to make. Before copying the form shortcode, just simply go to MC4WP → Forms and paste the code below:
<div class="form-inline">
<input class="email" name="EMAIL" required="" type="email" placeholder="[email protected]" />
<input type="submit" value="Subscribe" />
</div>